The application to be installed on the IADEA equipment is provided by the 4yousee technical team and must be requested by sending an email to suporte@4yousee.com.br. Once downloaded, it must be placed in a USB or Micro SD and this in turn connected to the IADEA equipment..
Installation of the Player
To begin the installation, it will be necessary to use a mouse connected to the device. Meanwhile, when you start the computer, a screen like the following will appear:

Where we go to "Advanced" and then click 3 times in the lower right corner. At this point we recommend connecting the equipment to a network, either by cable or WiFi.

Later, the initial screen of the android device will appear and we must go to the list of all the applications to open the "ApkInstaller".


Then, we click on "Install" we choose the place where the apk is located. This can be on a USB or on an Micro SD.


From here, and having clicked on "Install", the player will open and it will show the steps for configuring a player. You can consult the article configuration of an Android player, if you have doubts when configuring your player.
Configuration of HDMI IN
This configuration is subject to the characteristics of the device since not all IADEA devices have this resource. However, in 4YouSee we developed a trial version to recognize the input through this port and thus disable it in the main area of the player. In this way, when the player is running and for the device to be able to transmit the content through the HDMI IN port, you must have the HDMI cable connected from the source you want to display. As the following image shows.

HDMI IN: Here is connected an HDMI cable that comes from the source that you want to show, and can be, from a laptop, to a television signal.
HDMI OUT: Here is connected an HDMI cable that goes to the screen that will show the content of the playlist of the configured player.
HDMI OUT: Here is connected an HDMI cable that goes to the screen that will show the content of the playlist of the configured player.
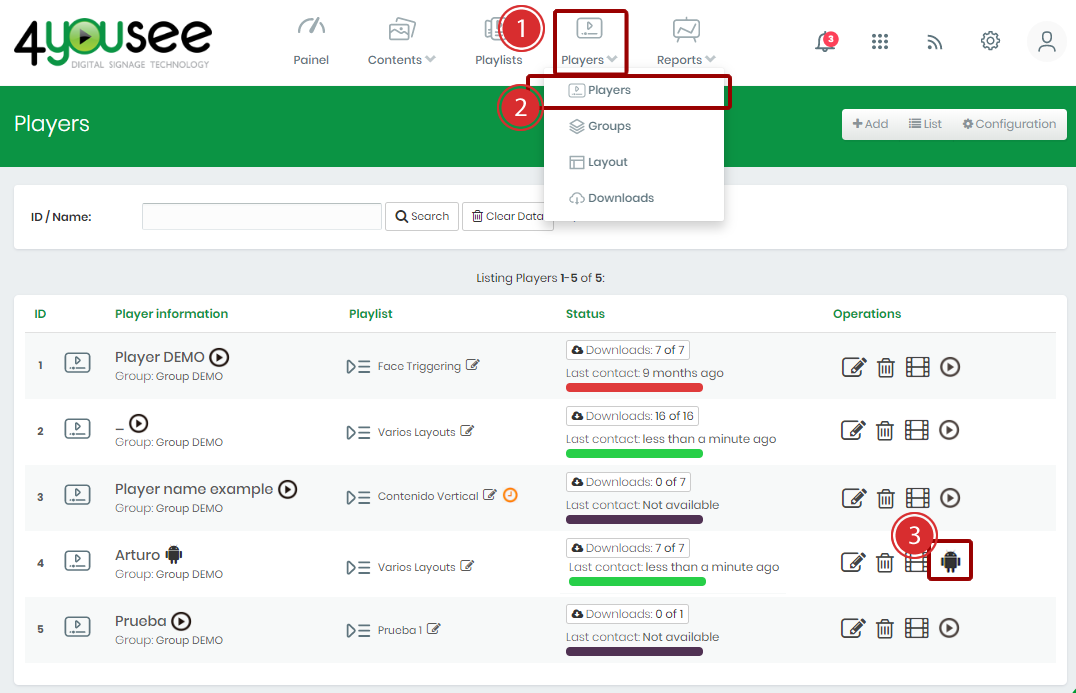
In this way, to switch the content shown on the screen, we must access the 4YouSee manager account, to enable the HDMI IN option. We go to the player settings that we just installed in the Players > Players menu as shown in the following image, Click on the android button at the bottom of the window on the right side, then on Set Up Player.


Then click on HDMI IN to enable the option to show what is being transmitted through the device's HDMI input and then on Save so that the changes are reflected:

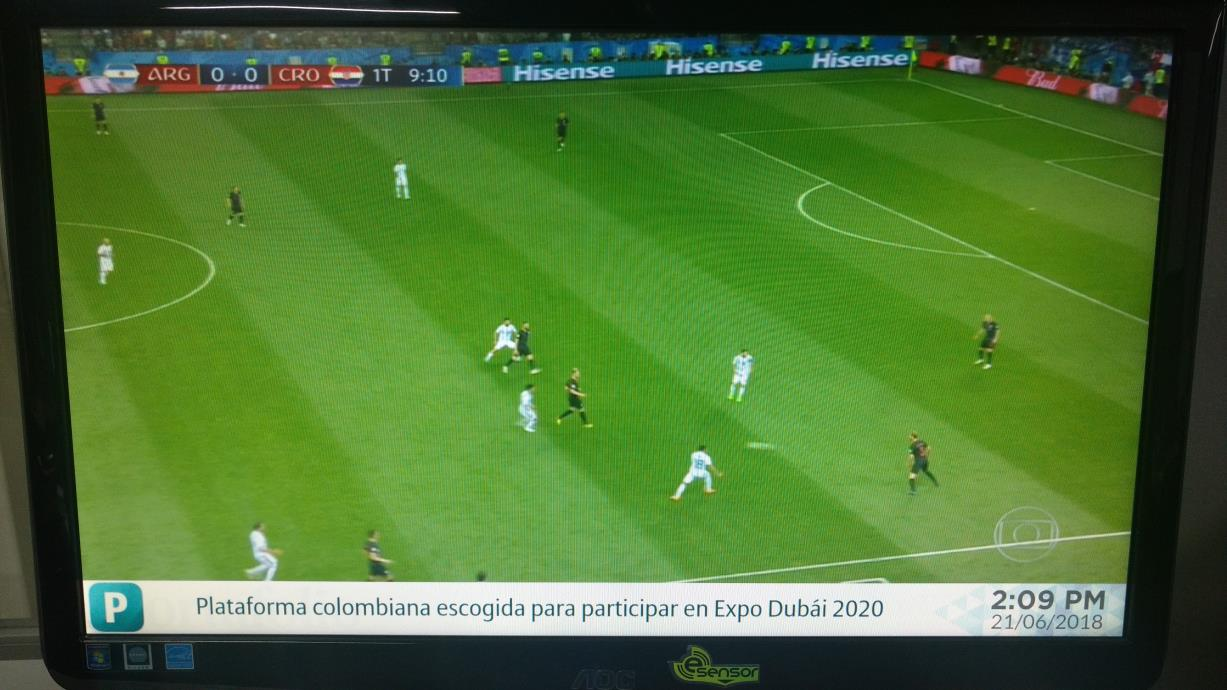
Thus, when these changes are saved, the player will stop showing the content of its playlist to show the signal it is receiving through the HDMI IN port. Here are some examples of how the player would look showing the content with the HDMI IN functionality:


